Introduction
The Python ecosystem has a lot of web frameworks. One that has consistently been popular is the Django framework. It's popular for being robust, secure, and allows developers to develop projects fast and meet their deadlines. It is free and open-source, and it works on both Windows and *nix systems.
In this tutorial, you will learn how to install Django on Windows using pip. After that, you will verify the installation, create a project, and start a Django development server.
Prerequisites
Before you install Django, you must make sure that Python is installed on your system. You can check out this guide — how to install python on windows to learn how to do it.
The commands that you will run in this tutorial were tested on the PowerShell shell, but most commands should work on Windows Command Prompt(CMD) with a few exceptions. For a smooth experience, I would suggest you use PowerShell for this tutorial.
Step 1 — Opening PowerShell
First, you need to open PowerShell on your computer. You can do that by searching for PowerShell in the Windows search box or you can open the Run dialog box by holding the Windows logo key and R(WIN+R). Once the dialog is open, type powershell, and then click OK.
You should now have the PowerShell window opened.
Now that you have opened PowerShell on your computer, you'll verify the installation of Python in the next section.
Step 2 - Verifying Python Installation
Before you install Django, first, you need to make sure that you installed Python on your system.
To do that, type the following command in PowerShell prompt to verify the installation:
- python -V
-V option logs the Python version installed on your system.
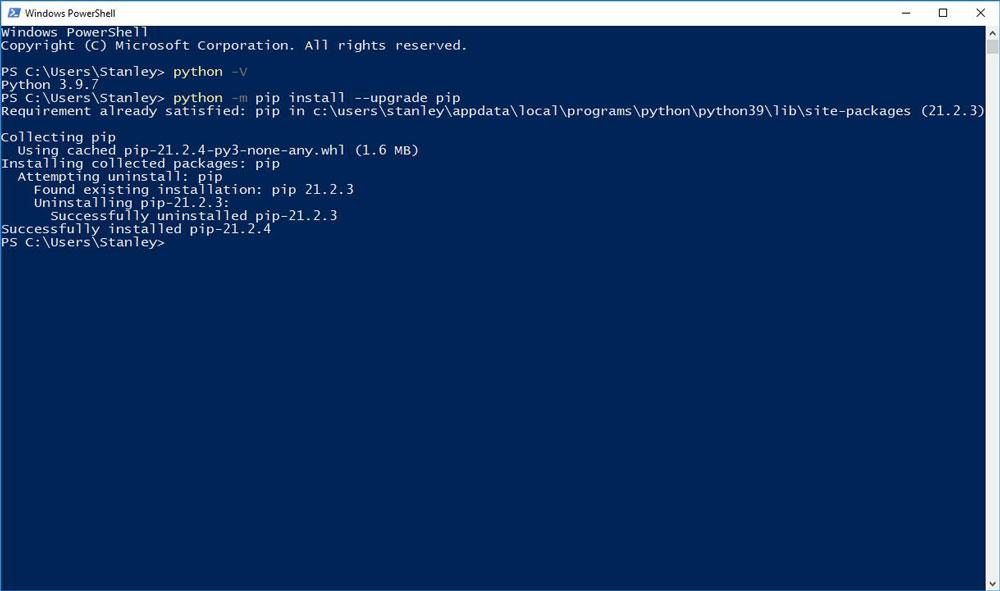
After running the command, you should see output like this:
PS C:\Users\Username> python -V
Python 3.9.7
At the time of writing, it is Python 3.9.7. You might have a different version from mine, and that's fine. As long as you see the Python version logged, Python is installed on your system.
Now that you've confirmed Python is installed on your system, you will upgrade pip.
Step 3 - Upgrading Pip
Python comes with pip by default. But most of the time, it comes with an old version. it's always a good practice to upgrade pip to the latest version.
Enter the following command to upgrade pip on your system:
- python -m pip install --upgrade pip
You'll get output identical to the following screenshot showing you that the upgrade was a success:
Now you've upgraded pip, you'll create the project directory where you'll install Django.
Step 4 - Creating a Project Directory
In this section, you will create a directory that will contain your Django application. We will name it django_project since this tutorial is a demo. But in a real project, you can give the directory a suitable name, such as forum, blog, etc.
Change into your Desktop directory with the cd command:
- cd Desktop
Create the directory using the mkdir command:
- mkdir django_project
Move into the django_project directory using the cd command:
- cd django_project
Your prompt should now show you that you're in the django_project directory as shown in the following output:
- PS C:\Users\Stanley\Desktop\django_project>
Now that you've created the working directory for your project, you'll create a virtual environment where you'll install Django.
Step 5 - Creating the Virtual Environment
In this step, you'll create a virtual environment for your project. A virtual environment is an isolated environment in Python where you can install the project dependencies without affecting other Python projects. This lets you create different projects that use different versions of Django.
If you don't use a virtual environment, your projects in your system will use the same Django version installed globally. This might look like a good thing until the latest version of Django comes out with breaking changes causing your projects to fail altogether.
You can learn more about the virtual environment by following Python Virtual Environments: A Primer.
To create a virtual environment, type the following command and wait for a few seconds:
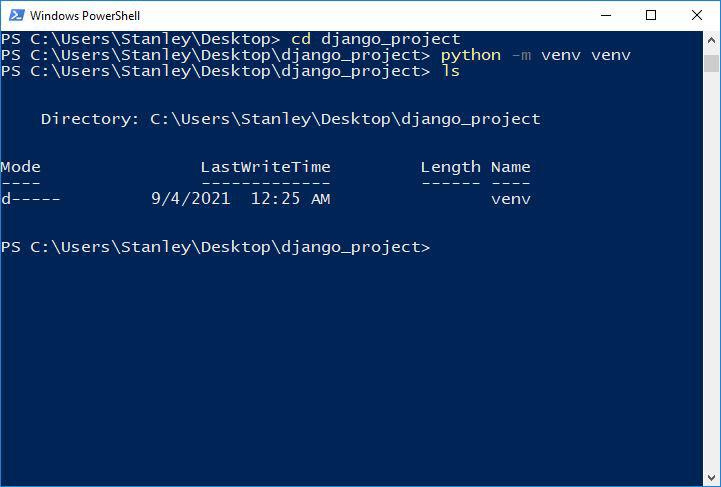
- python -m venv venv
The command will create a directory called venv inside your project directory.
Next, confirm the venv directory has been created by listing the directory contents using the ls command:
- ls
You should see the directory venv in the output as shown in the following screenshot:
Now you've created the virtual environment directory, you'll activate the environment.
Step 6 - Activating the Virtual Environment
In this section, you'll activate the virtual environment in your directory.
Run the following command to activate the virtual environment:
- venv\Scripts\activate
After you run the command, you will see
a (venv) at the beginning of the prompt. This shows that the virtual environment is activated:
(venv) PS C:\Users\Stanley\Desktop\django_project>
If you run into the error shown in the following screenshot on PowerShell when activating the virtual environment, for the sake of brevity, I described the reason and the solution in another post. Follow Solution to "Running Scripts Is Disabled On This System" Error on PowerShell and don't close your PowerShell:

Now that you've activated the virtual environment for your project, the moment you've been waiting for is here. It's time to install Django!
Step 7 - Installing Django
In this section, you will install Django on your system using pip.
Run the following command to install Django using pip install:
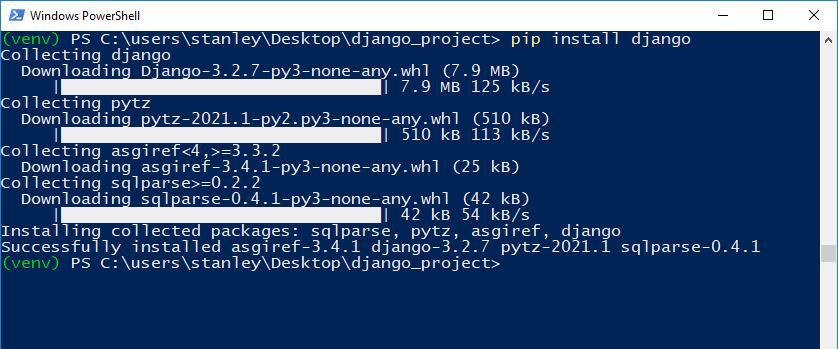
- pip install django
The command will install the latest version of Django. You should see Django being downloaded as shown in the following screenshot:
If you want to install a different Django version, you can specify the version as follows:
- pip install django==3.1
Once the installation finishes, you need to verify that Django has been installed. To do that, type the following command:
- django-admin --version
You will get output showing you the Django version installed on your system:
(venv) PS C:\users\stanley\Desktop\django_project> django-admin --version
3.2.7
At the time of writing, the latest Django version is 3.2.7, and that's why my output shows that.
You've now installed Django on your system, great job! You'll begin to create a Django project.
Step 8 - Creating the Django Project
Now it's time to create a project. A project has a different meaning from what you may be used to. The Django documentation defines it as:
A Python package – i.e. a directory of code – that contains all the settings for an instance of Django. This would include database configuration, Django-specific options and application-specific settings.
You create a project by using the command-line utility django-admin that comes with Django. The command generates files where you can configure the settings for your database, add third-party packages for your project to mention a few.
Create the project using the django-admin startproject command:
- django-admin startproject test_project
Change into the test_project directory:
- cd test_project
Type the following command to see the contents in the project directory:
- ls test_project
You will get output similar to this:
Output(venv) PS C:\users\stanley\Desktop\django_project\test_project> ls

   Directory: C:\users\stanley\Desktop\django_project\test_project

Mode                LastWriteTime         Length Name

----                -------------         ------ ----

d-----         9/4/2021   1:25 AM                test_project

-a----         9/4/2021   1:25 AM            690 manage.py
The directory test_project contains Django configuration files. The manage.py file comes in handy when starting a development server, and that's what you will do in the next step.
Step 9 - Running the Development Server
Now that the project has been created, we will start the Django development server.
Start the development server using the manage.py runserver command:
- python manage.py runserver
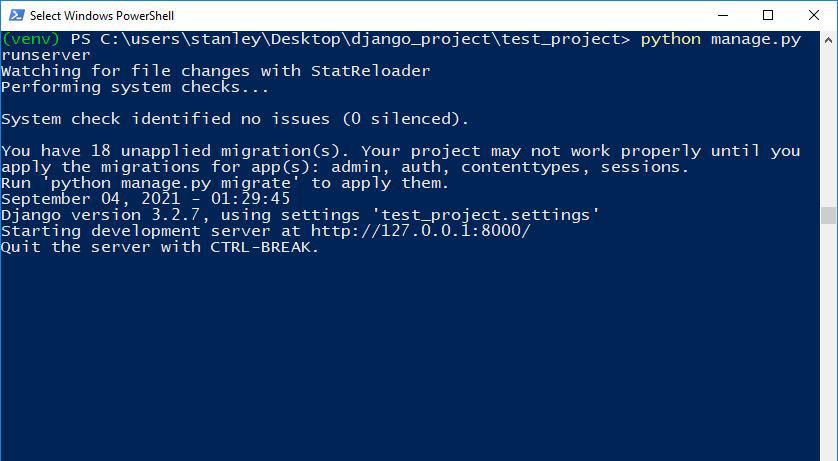
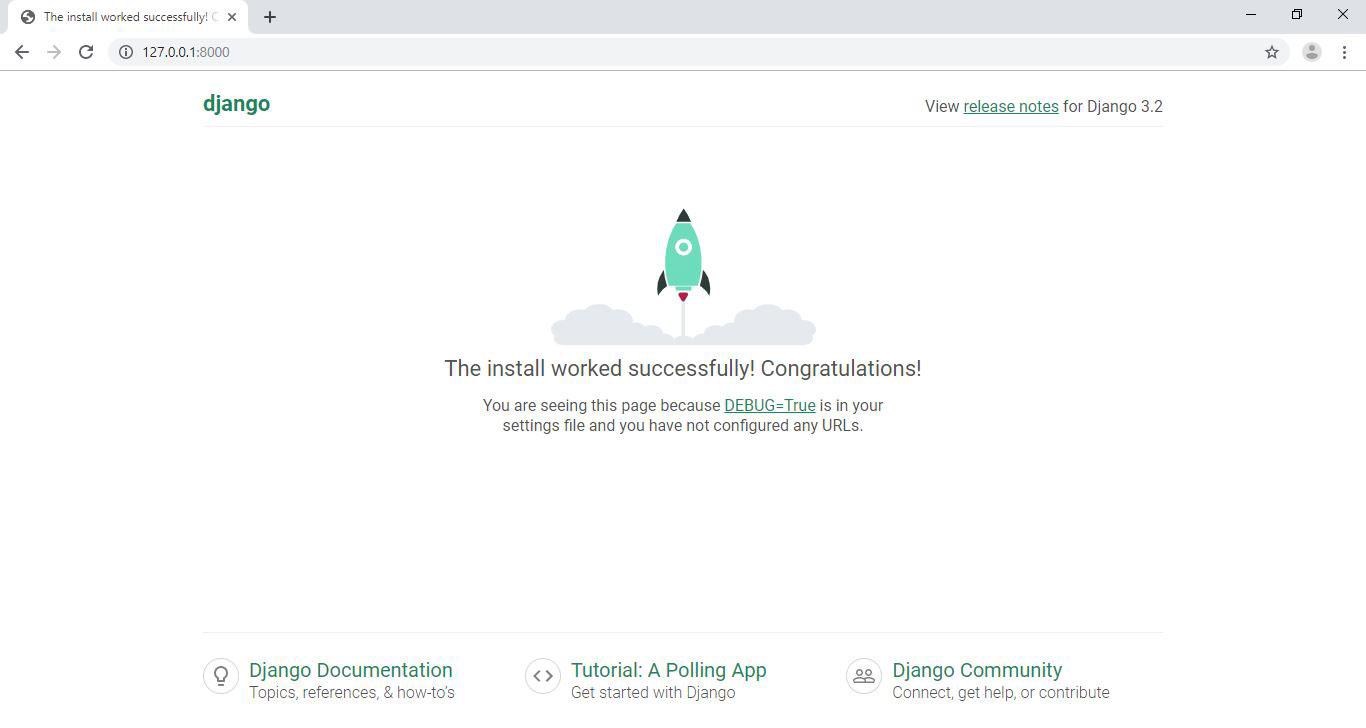
Next, visit http://127.0.0.1:8000/ in your web browser. You should see a page similar to the following screenshot:
Tip You can stop the server by holding CTRL+C. To deactivate the virtual environment, you can type deactivate on the prompt.
Now, you are ready to start developing your project.
Conclusion
You have come to the end of this tutorial, you learned how to install Django on Windows, verifying the installation and you also learned how to create a Django project, and start a development server. You can visit Django's official tutorial to learn how to build an application, see Writing your first Django app, part 1.
Thank you for reading and don't forget to follow me on Twitter for more tips.