Introduction
I decided to try out ESLint the other day after years of coding with Javascript without any linter. A linter is a tool that helps in enforcing a consistent style in your code. It will highlight errors with your code as you write, and it also offers some tips on how to improve your code.
In this tutorial, we are going to install and set up ESLint globally with Airbnb Style Guide, and then set it up to work with VSCode. Setting up ESLint globally is very helpful because it acts as a default configuration for every project you work on. Every time you start a new project, you will have ESLint ready for you. In cases where a project would require different settings, you can always override the global configuration by setting up ESLint locally.
When you're done with this tutorial, you will be able to use ESLint in every project with VSCode.
Step 1 — Check if Node is Installed
Let's make sure we have the latest version of Node installed on our computer:
- node -v
The command will show you the Node version installed, At the time of writing, the latest version is v10.16.3.
Let us also make sure we have the latest version of NPM installed:
- npm -v
The command will print the NPM version you have installed, mine prints 6.9.0 which is the latest version of NPM at the time of writing.
Now that we have made sure that we have the latest version of Node and NPM installed, let's proceed to install ESLint.
Step 3 — Install ESlint Globally
Let us now install ESLint together with the Airbnb style guide. Airbnb Style Guide requires the following packages:
eslint-config-airbnb: contains standards and Eslint ruleseslint-plugin-import: supports import syntaxeslint-plugin-react: It has ESLint rules for Reacteslint-plugin-react-hooks: has Eslint rules for React Hookseslint-plugin-jsx-a11y: enforces react accessibility rules.
Let's type the following command, which will install ESLint together with Airbnb Style guide ad its dependencies:
- npm install -g eslint eslint-config-airbnb eslint-plugin-import eslint-plugin-jsx-a11y eslint-plugin-react eslint-plugin-react-hooks
If you don't use React, you can reduce the number of dependencies by excluding eslint-plugin-jsx-ally, eslint-plugin-react-hooks, and eslint-plugin-react like this:
- npm install -g eslint eslint-config-airbnb-base eslint-plugin-import
If your on Mac or Linux, use sudo to avoid permission errors:
- sudo npm install -g eslint eslint-config-airbnb eslint-plugin-import eslint-plugin-jsx-a11y eslint-plugin-react eslint-plugin-react-hooks
Step 3 — Set up ESLint Configuration File
Let us now set up ESLint configuration file in our home directory.
Navigate to your home directory by typing the following command:
- cd ~
Your prompt should be similar to this:
- username@hostname:~$
On Windows, it should appear like this:
- C:\Users\Username>
Let's create the .eslintrc file
Type the following:
- code .eslintrc
code command will open VSCode with .eslintrc file opened.
Copy and paste the following code in the .eslintrc file and save(CTRL+S).
{
 "env": {
 "browser": true,
 "es6": true,
 "node": true
 },
 "extends": [
 "airbnb-base"
 ],
 "rules": {
 }
}
When you set up the .eslintrc in the home directory, ESLint will use the configuration file as the default for every project you create.
You can always override the global config by setting up the `.eslintrc' in the project, but that is a topic for another day.
Now that we have our .eslintrc file created, let's setup ESLint with VSCode.
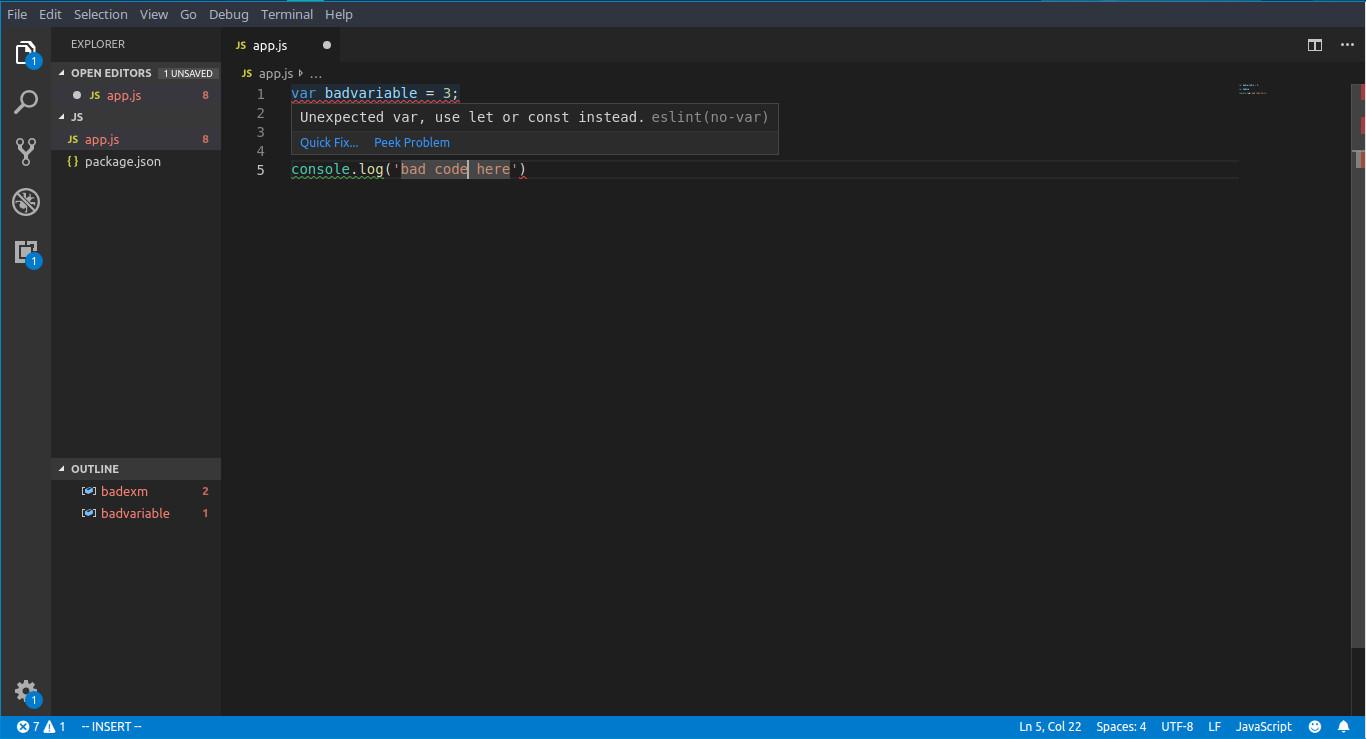
Tip: Even without a code editor, you can be able to lint a javascript file anywhere in a project by typing eslint filename.js. It will display the errors in the terminal, it can come in handy sometimes.
Step 4 — Set up ESLint with VSCode
Let us now open VSCode.
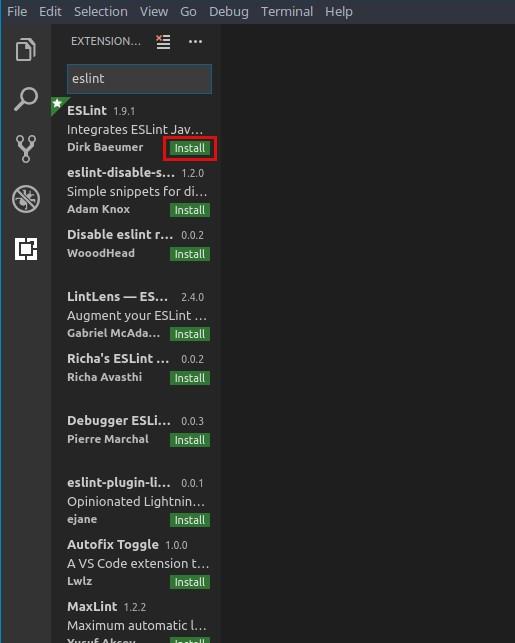
Click on the extensions icon or press CTRL+SHIFT+X to open the extensions dialog.
![]()
Type 'eslint' in the search dialog and choose the first option from the search results, and click install.
Now we are set, ESLint is now working right in our VSCode editor.
Conclusion
In this article, you set up ESLint globally and configured it with VSCode. Now you can write better code with ESLint catching your errors, offering tips and many more.
You can learn more about Airbnb style guide to learn more about its rules and standards.